Realistically I'll probably not go back and post on all the work in the fashion I previously did so here's a quick summary and lots of pics.
I've also just noticed that there has been an 'enhancement' on the picture aspect: if you click on any of the pics within a post you are then presented with a gallery of all the others in the same post.
work done includes:
- passenger side outer and inner arches welded in place
- tops of inner and outer sills all spot welded together
- bottoms of outer sills plug welded to floor edges
- all 4 sill end caps in place including troublesome driver's side rear where 'window' was larger than cap
- sill tread plates re-fitted in exact right locations
- repairs to fronts and sides of exhaust tunnel panels
- rear valance protective primer removed and re-primed with further trimming to it and original body, prior to final fitting
- sand blasting of exhaust tunnel panels
- driver's side sill fitting problem sorted out
- upholstery cleaned and re-fitted
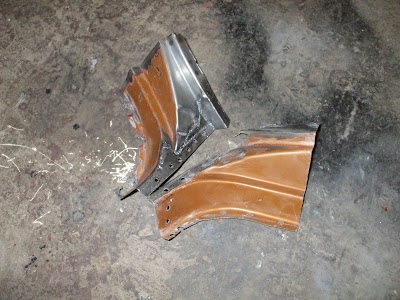
- rear wing bumper locating brackets removed for rust removal and repairs to wing lower edge

very pleasing, visually, the re-instated curve of the RHS fuel tank closing panel

surface rust in these areas blasted off. also provides good key for primer/paint

similar to driver's side. repair done to curve. this side of car less rusty for some reason. patch also needed at bulbous area for fuel tank mount-bolts as metal was thin

wider angle of same area after sandblasting, patch repairs and priming. top of patch still needs to be welded

driver's side area before any work. looks reasonably sound

curved patch on front face done a long time ago but blasting revealed repairs needed at concave pressing towards rear and in front cornert and small patch above top slotted hole curved face

areas above will not be blasted or painted as have very little corrosion and will be flooded with modern wax/rust-proofer solutions
corrosion on rear wing/bumper blades
cut made at corner. easier than taking more panels off at rear to free curved section of bumper bracket
taking off bumper bracket also exposes hidden part of wing for blasting/repairs
brackets being blast cleaned

feet can be welded back in once repairs complete

rear seats stored in rafters and covered still picked up a worrying amount of dust etc

centre, cleaned up easily with Turtle Wax leather cleaner, contrasts against outer area

seats stored in rafters looked to have been damaged badly

cleaned seats look great. difference between leather facings and synthetic rear/sides is evident
outer wing repair panels seam welded in. distortion hard to avoid
standard repair panel looks rather flared here
passenger side inner and outer sill being levered & clamped together for final spotwelding
front of driver's side inner sill. repaired a long time ago but recently given a lick of primer
nice to see sills in place again with tread plates re-fitted


No comments:
Post a Comment